Here's an overview:
- Introduction to DTF Transfers and CMYK Color Model
- Why Converting Images to CMYK Matters
- Understanding RGB vs CMYK Color Models
- Step-by-Step Guide to Converting Images to CMYK in Photoshop
- Common Pitfalls and How to Avoid Them
- Best Practices for Achieving Accurate Color Reproduction
- Tools and Plugins to Enhance Your Workflow
- Troubleshooting Common Issues in CMYK Conversion
- Tips for Maintaining Image Quality During Conversion
- Real-World Examples and Case Studies
- Advanced Techniques and Pro Tips
- Final Thoughts and Summary
Introduction to DTF Transfers and CMYK Color Model
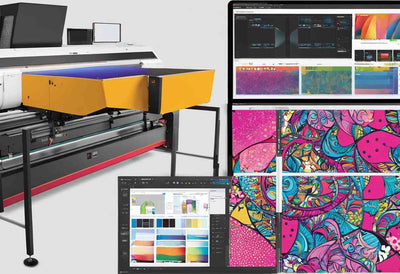
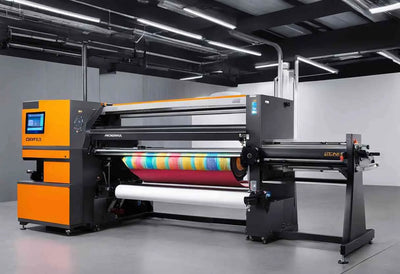
DTF (Direct-to-Film) transfers provide a versatile method for applying intricate designs to various materials. One can print DTF transfers easily by following a DIY guide. The CMYK (Cyan, Magenta, Yellow, Black) color model is crucial for ensuring accurate color reproduction.
Importance of DTF Transfers
- Allows detailed and vibrant designs
- Suitable for various materials
- High-quality results with premium DTF supplies
Key Elements of CMYK Color Model
- Cyan: Base color for blue hues
- Magenta: Critical for red and purple tones
- Yellow: Essential for warmer colors
- Black: Adds depth and contrast
Using the optimal DTF heat press settings guide, one ensures precise design placement and vivid colors. This section provides an overview of the basic concepts necessary for understanding the connection between DTF transfers and the CMYK color model.
Why Converting Images to CMYK Matters
Converting images to CMYK is crucial for achieving accurate color reproduction in print DTF transfers. Most digital images are in RGB format, which is suitable for screens but not for printing. Using CMYK ensures that the colors on screen match the final printed product, especially for DTF supplies and projects.
- Accurate Color Matching: Ensures the final product's colors match the intended design, crucial for premium DTF supplies for quality printing results.
- Professional Results: Achieve consistency and reliability in DTF ready to press transfers.
- Print DTF Transfers Easily: Convert images to CMYK to follow your DIY guide and master DTF transfers pressing easily.
- Optimized for Printing: Use the optimal DTF heat press settings guide to ensure vivid and precise colors.
Choosing the right color mode can enhance the quality of UV DTF printing solutions, making projects stand out. Consult a DTF transfer placement guide for perfect alignment and accurate colors.
Understanding RGB vs CMYK Color Models
Understanding RGB and CMYK color models is vital when converting images for Direct-to-Film (DTF) transfers.
-
RGB (Red, Green, Blue) Color Model:
- Primarily used for digital screens.
- Employs additive color mixing.
- Wide color gamut makes it ideal for web-based visuals.
-
CMYK (Cyan, Magenta, Yellow, Key/Black) Color Model:
- Used in printing processes.
- Uses subtractive color mixing.
- Essential for achieving optimal print accuracy and vibrancy.
When focusing on producing high-quality DTF transfers, knowing the key differences helps in ensuring the printed colors match the design intent. Tools and guides like "DTF ready to press," "print DTF transfers easily – your DIY guide," and "optimal DTF heat press settings guide" facilitate this process. Utilizing "premium DTF supplies for quality printing results" is also crucial in achieving a vibrant final product.
Step-by-Step Guide to Converting Images to CMYK in Photoshop
To print DTF transfers easily, following these steps ensures high-quality results using premium DTF supplies.
-
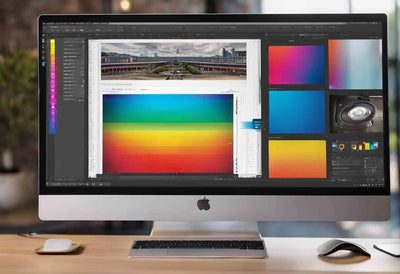
Open Image in Photoshop
- Launch Photoshop.
- Open the image for DTF transfer.
-
Convert to CMYK Color Mode
- Go to
Image>Mode>CMYK Color. - Confirm conversion.
- Go to
-
Adjust Colors
- Use
Adjustmentsunder theImagemenu. - Ensure optimal printing colors.
- Use
-
Save File Correctly
- Save as
.TIFFor.PSD. - Maintain quality for UV DTF printing solutions.
- Save as
Refer to the optimal DTF heat press settings guide, DTF supplies, and DTF transfer placement guide in the DIY guide: make DTF transfers at home easily.
Common Pitfalls and How to Avoid Them
Overlooking Color Settings
Ensure the image is in CMYK mode. Converting RGB to CMYK is vital. RGB images may appear too vibrant on fabric due to the printing process, compromising the quality.
Ignoring Image Resolution
Images with low resolution result in pixelation. Use high-resolution images for crisp results. Specially, for [dtf ready to press](https://dtfdallas.com/pages/dtf-ready-to-press) projects, maintaining a minimum of 300 DPI is recommended.
Misalignment During Pressing
Improper alignment leads to poor results. Use a dtf transfer placement guide to ensure precise positioning.
Incorrect Heat Press Settings
Refer to the optimal dtf heat press settings guide to achieve the perfect press. Most errors stem from incorrect temperature, pressure, and time settings.
Using Subpar Supplies
Invest in premium dtf supplies for quality printing results. Substandard supplies can lead to inconsistent transfers and durability issues.
Skipping Test Prints
Always test print. Testing helps in catching errors. Follow guidelines from master dtf transfers pressing easily our guide for better understanding.
Not Following DIY Guidelines
For home projects, adhering to the diy guide make dtf transfers at home easily ensures the expected outcome. Mistakes often result from not following instructions precisely.
Using these precautions will help avoid common issues and ensure perfect DTF transfers with Photoshop.
Best Practices for Achieving Accurate Color Reproduction
Achieving accurate color reproduction is crucial for DTF transfers. It ensures print quality and color consistency. Follow these best practices:
-
Monitor Calibration Ensure your monitor is calibrated correctly. This step helps in previewing accurate color.
-
CMYK Conversion Convert RGB images to CMYK before printing. This helps match the printer color gamut.
-
Use Premium Supplies Choose premium DTF supplies for quality printing results. Inferior supplies can distort colors.
-
Test Prints Make test prints to compare colors on the screen to printed colors.
-
Heat Press Settings Follow the optimal DTF heat press settings guide. Incorrect settings can affect color and quality.
-
Lighting Conditions Work under consistent lighting to assess colors accurately.
-
Quality Check Conduct a quality check post-print to ensure colors are as desired.
"Master DTF transfers pressing easily – our guide."
Tools and Plugins to Enhance Your Workflow
Utilizing the right tools and plugins can significantly enhance your DTF (Direct-to-Film) workflow. By integrating specific resources, users can ensure that their DTF ready to press projects achieve professional-grade results. Consider the following:
- Adobe Capture: Converts images to vector graphics and seamlessly integrates with Photoshop.
- ColorTide Plugin: Ensures accurate color conversions for CMYK, vital for uv dtf printing solutions.
- ON1 Resize: Helps resize images without losing quality, optimizing DTF transfer placement guide accuracy.
- MockupEverything: Visualize dtf transfers easily your DIY guide before pressing.
- Topaz Labs AI Suite: Enhances image details and sharpens quality for premium dtf supplies for quality printing results.
- PerfectResize: Specialized for upscaling images, ensuring crisp prints.
For mastering DTF transfers and achieving optimal results, pairing these tools with an optimal dtf heat press settings guide is crucial.
Troubleshooting Common Issues in CMYK Conversion
When converting images to CMYK for DTF ready to press transfers, several common issues may arise. Understanding these pitfalls can significantly improve the quality of your DTF outputs.
- Color Shifts: Color shifts often occur during conversion due to the limited CMYK color gamut. Use a color profile suited for DTF projects to minimize discrepancies.
- Loss of Detail: Image details can be lost. Optimize your image resolution before starting the conversion process.
- Incorrect Black Generation: Ensure to use correct settings for black ink to avoid muddy prints.
- Banding Issues: Banding can arise from improper file settings. Use high-quality DTF supplies and follow an optimal DTF heat press settings guide for best results.
- Blurry Prints: Low-resolution images can result in blurry prints. Always use high-res images for premium DTF supplies for quality printing results.
Refer to a DTF transfer placement guide and other resources like a DIY guide make DTF transfers at home easily to master DTF transfers pressing easily.
Tips for Maintaining Image Quality During Conversion
When converting images to CMYK for DTF ready to press solutions, ensuring the highest quality is paramount. Using premium DTF supplies for quality printing results involves several important steps:
-
Use High-Resolution Images: Start with high-resolution images to avoid pixelation and loss of detail.
-
Adjust Color Settings: Use the correct CMYK profile to maintain color fidelity. Adobe Photoshop’s CMYK settings offer a good starting point.
-
Proper Layer Setup: Ensure your layers are organized and named. This simplifies the process of adjusting individual elements.
-
Color Proofs: Conduct color proofs to preview how colors will appear when printed, ensuring accuracy if following a DTF transfer placement guide.
-
Sharpen Image: Apply subtle sharpening to enhance detail without causing noise or artifacts.
-
Gradients and Blending Modes: Avoid drastic gradients or blending modes as they might not convert well to CMYK.
With these steps in print DTF transfers easily your diy guide, anyone can master image conversion efficiently.
Real-World Examples and Case Studies
DTF printing, or Direct-to-Film printing, has garnered considerable attention for its versatility and high-quality results. Here are some real-world examples demonstrating the effectiveness of converting images to CMYK for DTF transfers.
Example 1: Custom Apparel Business
A custom apparel business utilized CMYK conversions to produce DTF ready to press transfers. By using premium DTF supplies for quality printing results, they noticed a significant enhancement in color accuracy and vibrancy, leading to higher customer satisfaction.
Case Study 1: Small Business Owner
A small business owner followed the DIY guide to make DTF transfers at home easily. Using a DTF transfer placement guide, they could ensure consistent transfer positioning and high-quality output. The optimal DTF heat press settings guide helped achieve professional results, boosting their business's credibility.
Example 2: Graphic Designers
Graphic designers adopted uv DTF printing solutions to enhance their projects. They reported that the CMYK conversion process in Photoshop allowed them to print DTF transfers easily, ensuring uniform color reproduction across various substrates.
Case Study 2: Hobbyists
Hobbyists leveraged the print DTF transfers easily with your DIY guide. By adhering to a master DTF transfers pressing easily with our guide, they successfully created custom designs. Their projects showcased impeccable color details, demonstrating the effectiveness of CMYK conversion.
Advanced Techniques and Pro Tips
Mastering DTF transfers with Photoshop requires understanding advanced techniques and leveraging pro tips for flawless results. These tips cover aspects from UV DTF printing to optimal heat press settings for premium quality.
-
Color Management
- Set up Photoshop's color settings to CMYK.
- Use ICC profiles for accurate color representation.
- Regularly calibrate monitors to avoid color discrepancies.
-
Layer Handling
- Flatten images before saving to avoid layer mishaps.
- Preserve a copy with layers for future edits.
-
Texture and Detail
- Adjust image resolution to 300 DPI for detailed prints.
- Use sharpening filters strategically to enhance textures.
-
Printing
- Choose premium DTF supplies for quality printing results.
- Refer to a DTF transfer placement guide for accurate positioning.
-
Heat Press Settings
- Follow the optimal DTF heat press settings guide.
- Ensure even pressure and correct temperature.
Implement these pro tips to print DTF transfers easily, boosting DIY projects. Following a comprehensive DIY guide makes DTF transfers at home manageable. Explore UV DTF printing solutions for creative enhancements. For consistent quality, return to a DTF ready to press setup, ensuring every transfer is perfect.
Final Thoughts and Summary
Converting images to CMYK for perfect DTF transfers with Photoshop is crucial to ensure vibrant and accurate print results. This process will enhance projects, whether using DIY methods or employing premium DTF supplies. Here are key takeaways:
- Preparation: Ensure images are in CMYK mode for optimal color accuracy.
- DTF supplies: Use premium DTF supplies for quality printing results.
- Guides: Follow a DTF transfer placement guide and an optimal DTF heat press settings guide for best practices.
- DIY Essentials: Use a DIY guide to make DTF transfers at home easily.
- Pressing: Master the art of DTF transfer pressing with our comprehensive guide.
By mastering these steps, users can print DTF transfers easily and achieve professional-grade quality.


