
How to Apply DTF Transfers: Heat Press Settings Guide
Oct 17, 2026
How-To20 min read15 chapters
Learning how to apply DTF transfers is the single skill that separates a crisp, wash-proof print from a faded, peeling mess. Direct-to-film (DTF) transfers arrive ready to press, which means the hard part (printing the design, laying the white ink, and curing the adhesive powder) is already done for you. Your job is to get three variables right at the same moment: temperature, time, and pressure. Dial those in, add a clean pre-press and the correct peel, and you can press a professional-grade shirt in under a minute. Get them wrong and you will chase lifting edges, cracked ink, and scorch marks for the rest of the garment's life.
This guide walks through exactly how to apply DTF transfers with a heat press, a home iron, or a Cricut-style press. We cover the full step-by-step process, a DTF temperature chart with typical general ranges by fabric, hot peel versus cold peel, the pre-press and second press, curing leftover powder, pressing gang sheets, washing and care, and a long troubleshooting section for when a transfer will not stick or starts to peel. Everything below is written as general guidance. The transfers you buy should ship with their own recommended settings, and when the printed instructions disagree with a chart online, the printed instructions win every time.
Key Takeaways
- Typical DTF heat press settings fall around 300°F to 325°F for roughly 10 to 15 seconds with medium to firm pressure, but you must follow the exact settings that came with your transfers.
- Pre-press the blank garment for 3 to 5 seconds first to drive out moisture and flatten wrinkles. This one step prevents most adhesion failures.
- Pressure matters as much as heat. Aim for firm, even pressure so the adhesive bonds into the fibers, not just onto the surface.
- Peel the carrier film the way your transfer specifies. Some films are hot peel, some are cold peel, and peeling at the wrong moment is a leading cause of lifted designs.
- A second press (10 to 15 seconds through parchment or a cover sheet) after peeling locks the ink down, improves wash durability, and lets you choose a matte or glossy finish.
- Heat-sensitive fabrics such as polyester and nylon need lower temperatures to avoid scorching and dye migration. When in doubt, go cooler and press longer.
- A home iron or Cricut-style press can work for small jobs, but a flat heat press delivers the consistent temperature and pressure that make prints last through dozens of washes.

01
What You Need to Apply DTF Transfers
Before you learn how to apply DTF transfers, gather the right tools. DTF is forgiving compared with some other decoration methods, but a few pieces of equipment make the difference between a hobby result and a sellable one. Here is the full checklist.
The essential equipment
- A heat source. A flat clamshell or swing-away heat press is ideal because it applies even heat and consistent pressure across the whole platen. A Cricut-style press or EasyPress works for small designs, and a standard household iron can get you through a pinch. We cover each option in detail below.
- Your DTF transfers. These are the printed, powdered designs on clear film. Order them ready to press so the curing is already handled, and browse the full catalog if you still need art.
- A blank garment or substrate. Cotton, polyester, poly-cotton blends, tri-blends, canvas, and many other fabrics all accept DTF. Stock up on blank t-shirts, hoodies, sweatshirts, or caps depending on your project.
- A cover sheet. Parchment paper, a Teflon sheet, or a silicone sheet protects the design during the second press and keeps residue off your platen. This also lets you control the final finish.
- A heat-resistant work surface. If you are using an iron, you need a hard, flat, heat-tolerant surface. Never use a soft ironing board, because it will not let you apply even downward pressure.
The helpful extras
- A lint roller to remove dust, fuzz, and pet hair from the print area. Any debris trapped under the film shows up as a bump or a gap in adhesion.
- A heat-resistant tape (sometimes called thermal tape) to hold a transfer in place on tricky curves like caps and sleeves.
- An infrared thermometer or a heat press test strip to confirm your platen is actually reaching the temperature it displays. Many presses read 20°F to 40°F off from the true surface temperature.
- A heat pad or pillow to raise seams, zippers, and pockets so the design area sits flat against the platen.
- A pair of heat-resistant gloves for hot peels and for handling garments straight off the press.
The best heat press for DTF transfers is the one that can hold a steady temperature and deliver firm, even pressure. Hobbyists do excellent work on compact presses, while shops running volume lean on larger auto-open or pneumatic machines. What matters is consistency, not brand. If your press runs hot or cold, or if pressure is uneven corner to corner, no chart in the world will save the print.
A quick word on what DTF transfers are
If you are new to this method, a short primer helps everything below make sense. DTF stands for direct-to-film. The design is printed in reverse onto a special clear film using water-based pigment inks, a layer of white ink is laid down behind the color to make it pop on dark garments, and then a hot-melt adhesive powder is applied over the wet ink and cured so it fuses into a smooth layer. The result is a finished transfer sitting on a carrier film, waiting for heat to release it onto fabric. Because the color and the adhesive are already locked into the film, you are not printing anything when you apply a transfer; you are simply using heat and pressure to move the design from the film onto the garment and melt the adhesive into the fibers.
That is why DTF is so beginner-friendly compared with methods like screen printing or sublimation. There are no screens to burn, no color separations to manage, and no restriction to light-colored polyester the way sublimation has. A single DTF transfer can go onto cotton, polyester, blends, nylon, canvas, leather-look materials, and more. The flexibility is enormous, which is exactly why getting the application right is worth your attention: the transfer gives you professional artwork for free, and the press is the only place you can ruin it.
Setting up a repeatable workspace
Consistency is the quiet secret behind shops that turn out flawless prints all day. Set up a small station where everything has a place: press on a sturdy table at a comfortable height, blanks stacked and pre-folded on one side, trimmed transfers laid out in press order on the other, lint roller and tape within reach, and a cooling area for cold-peel pieces. The less you move around and the more your process becomes muscle memory, the fewer mistakes you make. Write your tested settings for each fabric on a card and tape it to the wall by the press so you are never guessing mid-batch.
02
DTF Heat Press Settings: Temperature, Time, and Pressure
The phrase "dtf heat press settings" hides three separate controls that work together. Think of them as a recipe where changing one ingredient changes how much of the others you need. Below, each variable is explained as typical general guidance. Always defer to the settings printed on or shipped with your transfers, because films, inks, and powders vary by supplier.
DTF Dallas recommended settings. For our own ready-to-press transfers, press at 290°F to 310°F and hot peel immediately. Use high pressure for about 6 seconds, or medium pressure for 8 to 15 seconds. Pressed this way, our transfers are tested to survive 100+ washes. If you are applying transfers from another source, follow the instructions that shipped with them.
Temperature: how hot to press DTF transfers
For most DTF transfers on most fabrics, a typical application temperature lands somewhere between 300°F and 325°F (roughly 150°C to 163°C). That range is warm enough to melt the adhesive powder so it flows into the fabric fibers, but not so hot that it scorches cotton or triggers dye migration in polyester.
Temperature is the variable that most often needs adjusting by fabric. Natural fibers like cotton tolerate more heat. Synthetic fibers like polyester and nylon tolerate much less. When you press a heat-sensitive fabric too hot, two bad things happen: the surface can glaze or scorch, and the dyes in the garment can turn into gas and bleed up into the white ink layer, tinting your crisp white print pink, gray, or yellow. That effect is called dye migration, and it is the main reason we press synthetics cooler. If your transfer instructions give a range, start in the middle and adjust from there.
Time: how long to press a DTF transfer
A typical DTF press runs about 10 to 15 seconds. Lightweight single-layer garments sit at the shorter end. Thick garments such as hoodies, sweatshirts, and canvas bags often need a few extra seconds so the heat can travel all the way through to the adhesive layer against the fabric. If you press a thick hoodie for the same 10 seconds you would use on a thin tee, the outer face may feel hot while the adhesive underneath never fully melts, and the design lifts after the first wash.
Time and temperature trade off against each other within a safe window. If you must press cooler to protect a delicate fabric, extend the dwell time a little to compensate. If you are pressing a heat-tolerant cotton at the higher end of the range, you can shorten the time slightly. Do not try to rescue a too-cool press by cranking the heat far above the recommended range, because you will scorch the garment before the adhesive catches up.
Pressure: the variable everyone forgets
Pressure is the most overlooked of the three settings, and poor pressure causes more peeling than almost anything else. DTF adhesive needs to be physically pushed into the weave of the fabric while it is molten. Light, floaty pressure leaves the adhesive sitting on top of the fibers, where it shears off during wear and washing.
Aim for medium to firm pressure. On a manual press, that usually means you have to use real effort to close and latch the handle. A rough home test: with the press closed, you should not be able to slide a sheet of paper out from under the platen without tearing it. On caps and other uneven surfaces, pressure is harder to keep even, so a cap press or a small platen that matches the curve helps a lot. Always relieve seams, zippers, and collars with a pressing pillow so pressure does not concentrate on the high spots and leave the design area under-pressed.

Why your display temperature may lie
One more note on dtf heat press settings: the number on your press display is the temperature of the heating element, not necessarily the surface that touches your transfer. Cheaper presses in particular can read significantly off. If your prints keep failing even though your settings look correct on paper, check the real platen temperature with an infrared thermometer or a thermal test strip, and adjust the dial until the surface hits your target. A press that says 320°F but actually delivers 285°F will under-cure every transfer you run.
How temperature, time, and pressure work together
It helps to stop thinking of these three settings as separate dials and start thinking of them as one combined dose of energy delivered to the adhesive. The adhesive needs a certain total amount of heat energy, pushed into the fabric with enough force, to melt and bond properly. You have some freedom to trade the three against each other inside a safe window, but you cannot escape the window entirely.
- Lower temperature, longer time. If you must protect a delicate synthetic by pressing cooler, give the adhesive a little more time to reach its melting point. This is the single most useful trade in all of DTF pressing.
- Higher temperature, shorter time. On heat-tolerant cotton you can press near the top of the range for a touch less time, which speeds up production. Do not push past the recommended temperature, though, or you will scorch the fabric before saving any real time.
- Pressure is not negotiable. Unlike heat and time, you cannot trade away pressure. No amount of extra heat or time will fix a weak press, because the adhesive has to be physically driven into the weave while molten. Think of pressure as the gate: if it is not firm and even, nothing else you do matters.
A practical way to find your sweet spot on a new fabric is to press a single test transfer at the middle of the recommended range, let it cure fully, wait 24 hours, and then wash it a couple of times. If the edges hold and the color stays bright, you have your recipe. If an edge lifts, bump pressure first, then time. This ten-minute test saves you from ruining a whole batch of blanks on an untested setting.
03
DTF Temperature Chart: Typical Settings by Fabric
Below is a DTF temperature chart you can use as a starting point. These are typical general ranges, not guarantees. Fabrics, films, inks, and powders all vary, and the single most reliable source of truth is the instruction card that ships with your transfers. Use this chart to understand how settings shift across fabric types, then confirm against your supplier's numbers before you commit to a batch.
| Fabric type | Typical temperature | Typical time | Pressure | Typical peel | Second press |
|---|---|---|---|---|---|
| 100% Cotton | 310°F to 325°F | 12 to 15 sec | Medium to firm | Hot or cold (per film) | Yes, 10 to 15 sec |
| Poly-cotton blends | 300°F to 315°F | 10 to 14 sec | Medium to firm | Per film | Yes, 10 to 15 sec |
| 100% Polyester | 280°F to 300°F | 10 to 12 sec | Medium | Cold or warm | Yes, short, through cover sheet |
| Tri-blends | 285°F to 305°F | 10 to 13 sec | Medium | Per film | Yes, short |
| Nylon and performance fabrics | 260°F to 290°F | 10 to 15 sec | Light to medium | Cold peel | Yes, short, low heat |
| Canvas and tote bags | 300°F to 320°F | 12 to 18 sec | Firm | Per film | Yes, 10 to 15 sec |
| Caps and hats | 300°F to 315°F | 10 to 15 sec | Firm (use cap press) | Per film | Yes, short |
Two patterns are worth internalizing from this chart. First, as the synthetic content of a fabric goes up, the safe temperature comes down. Cotton can take the heat; polyester and nylon cannot. Second, thicker and bulkier items (hoodies, canvas, loaded totes) usually need a touch more time so the heat reaches the adhesive. If you print on a wide variety of blanks, keep a small log of what worked for each so you are not re-testing from scratch every time. You can source consistent blanks across apparel types from the blank and custom apparel collection so your settings stay repeatable.
04
How to Apply DTF Transfers Step by Step
Here is the core process, start to finish. This is how to apply DTF transfers with a heat press, and the same logic carries over to irons and Cricut-style presses with minor adjustments noted later. Read all the way through once before your first press so nothing surprises you mid-cycle.
Step 1: Set your press and let it reach temperature
Set your heat press to the temperature and time recommended for your transfer and fabric. Give the platen several minutes to fully heat and stabilize. Pressing before the platen is evenly hot is a common beginner mistake, because the first few presses of a session often run cool. If you have a thermometer or test strip, confirm the real surface temperature now. If your press has been sitting idle, it is worth running one throwaway close on an empty platen to even out the heat before your first garment, since the very first press after warm-up is the one most likely to come up short on temperature.
Step 2: Prepare and lint-roll the garment
Lay the blank flat on the lower platen with the print area centered and smooth. Run a lint roller over the print zone to lift off dust, loose fibers, and any pet hair. Trapped debris creates bumps and tiny voids where the adhesive cannot reach the fabric. Make sure seams, collars, and zippers are out of the press path or raised on a pillow.
Step 3: Pre-press the blank
Close the press on the bare garment for 3 to 5 seconds. This pre-press drives out moisture, relaxes wrinkles, and gives you a flat, dry, warm surface for the transfer. Moisture is an enemy of adhesion: a damp garment turns to steam under the platen and can stop the adhesive from bonding. Do not skip this step. It is the cheapest insurance you have against a failed press, and it is why so many troubleshooting problems trace back to a missing pre-press.
The pre-press does more than you might expect. Cotton and other natural fibers hold ambient humidity even when they feel dry to the touch, and that trapped moisture is enough to weaken a bond. The brief pre-press flashes it off. It also knocks down the fabric's surface texture so the transfer sits flat against a smooth face instead of bridging over wrinkles and fuzz. On a garment fresh out of packaging with fold creases, the pre-press is the difference between a crisp edge and a design that lifts along a crease line. If your shop is humid, consider a slightly longer pre-press, and always pre-press hoodies and heavyweight cotton a touch longer because they hold more moisture.
Step 4: Position the transfer
Place the transfer on the garment with the printed, powdered side down against the fabric and the clear carrier film facing up at you. Center it and line it up straight. A small ruler or a centering tool helps with alignment on the chest or back. For a standard adult tee, a common placement for a chest print is a few inches down from the collar. If the design wants to slide, a couple of small pieces of heat-resistant tape will hold it.
Step 5: Cover and press
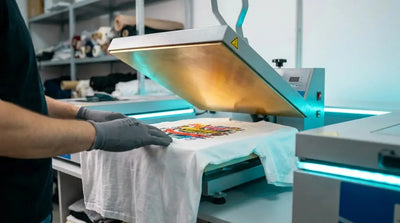
Lay a sheet of parchment paper or a Teflon cover sheet over the transfer to protect both the film and your upper platen. Close the press and apply firm, even pressure for the full recommended time. Do not lift early to peek. Let the timer run out so the adhesive fully melts and flows into the fabric.
Step 6: Open the press and handle the peel
Open the press. Now peel the clear carrier film according to your transfer's instructions, either while it is still hot (hot peel) or after it has cooled fully (cold peel). Peel in one smooth, steady, low-angle motion rather than yanking straight up. Starting from a corner and pulling back across the design at a low angle, almost parallel to the shirt, gives the cleanest release. Pulling straight up puts tension on the edges and is more likely to lift fine details. We cover peel timing in depth in the next section, because getting this wrong is a top cause of lifted edges.
Step 7: Second press to lock it in
After the film is off, place your cover sheet back over the design and press again for 10 to 15 seconds. This second press improves durability, seals the ink, and lets you set the finish. Press through parchment for a soft matte look or through a smooth Teflon or silicone sheet for a glossier look. Let the garment cool before you move, fold, or stretch it. Pulling a warm print can crack it before the adhesive has set.

05
Hot Peel vs Cold Peel DTF
One of the most searched questions about applying transfers is hot peel versus cold peel, and for good reason. Peeling at the wrong temperature can ruin an otherwise perfect press. The peel type is a property of the specific film your transfer is printed on, so the only way to know for certain is to read the instructions that came with your order.
What hot peel means
A hot peel film is designed to have the carrier removed immediately after you open the press, while the transfer is still hot. Hot peel is fast and convenient for production, because you are not waiting between presses. Peel in one smooth motion at a shallow angle. If a hot peel film resists or you see the ink wanting to lift with the carrier, stop, close the press for a couple more seconds, and try again, because that resistance usually means the design has not fully bonded yet.
What cold peel means
A cold peel film must cool completely before you remove the carrier. Peeling a cold peel film while it is still warm will pull up ink and distort the design. Cold peel often produces a slightly different surface texture and can give a sharper, more detailed edge on fine artwork. The tradeoff is time: you have to let each piece cool before you finish it. If you are running a batch of cold peel transfers, set up a cooling station so garments can rest while you press the next one.
How to tell which one you have
- Check the packaging or instruction card first. Suppliers label the peel type. This is the authoritative answer.
- Do a corner test if you are unsure. Lift one corner of the carrier gently. If the ink releases cleanly and stays on the shirt, continue. If it drags or lifts the design, lay it back down and let it cool (for cold peel) or press a few seconds longer (for hot peel).
- When genuinely unsure, default to cold peel. Waiting for the design to cool almost never hurts, while a premature hot peel can wreck the print.
06
Do You Need a Second Press on DTF Transfers?
Yes, a second press is strongly recommended for almost every DTF application, and skipping it is one of the quiet reasons prints fail early. The first press bonds the adhesive to the fabric. The second press, done after the carrier film is removed, seals the exposed ink surface, improves wash durability, and sets the finish you want.
How to do the second press
- Once the carrier film is off, place parchment paper or a Teflon or silicone sheet over the bare design.
- Close the press for 10 to 15 seconds at the same temperature, or slightly lower for heat-sensitive fabrics.
- Open, remove the cover sheet, and let the garment cool fully before handling.
Choosing your finish
The second press is where you control the look of the print. Pressing through parchment paper tends to leave a soft, matte, fabric-like surface. Pressing through a smooth Teflon or silicone sheet tends to leave a glossier, more plastic-looking surface. Neither is wrong; it is a style choice. Many shops standardize on a matte finish because it reads as higher quality on apparel and hides minor imperfections. Decide what look fits your brand and keep it consistent across a batch so every piece matches.
When a second press matters most
The second press matters most on items that will be washed often, stretched, or worn hard: everyday tees, kids' clothing, athletic wear, and tote bags. For a one-off decorative piece that will rarely be laundered, you can get away with less, but it still only costs you 10 to 15 seconds to meaningfully extend the life of the print, so make it a habit.
A small production tip: keep a stack of cut parchment sheets or a couple of dedicated Teflon sheets next to your press so the second press never slows you down. Many shops run the second press at a slightly lower temperature than the first, especially on synthetics, to add durability without risking additional dye migration or scorching. Once you settle on a first-press and second-press recipe for each fabric you work with, write both numbers on your settings card so anyone at the press gets identical results. Consistency across a batch is what makes a run of garments look professionally made rather than handmade one at a time.
07
How to Press DTF Transfers by Fabric Type
DTF is remarkably versatile, which is part of why it has taken over so much of the custom apparel market. The same transfer can go on cotton, polyester, blends, and more, but each fabric behaves differently under heat. Here is how to adjust for the most common materials. Treat these as typical general ranges and confirm against your transfer's printed instructions.
Cotton
Cotton is the easiest and most forgiving fabric for DTF. It tolerates higher temperatures and firm pressure without scorching, so it sits near the top of the chart, commonly around 310°F to 325°F for 12 to 15 seconds. Pre-press to remove moisture, apply firm pressure, peel per your film, and finish with a second press. Cotton tees are where most people learn, and they deliver bright, durable results with minimal fuss. Stock quality blank t-shirts so your base material is consistent from batch to batch.
One thing to watch with cotton is garment color and fabric treatment. Ring-spun and combed cotton press beautifully and hold detail well. Heavily softened or chemically treated cotton can occasionally resist adhesion, so if a particular blank gives you trouble despite correct settings, a longer pre-press to drive off surface treatment and moisture usually solves it. Darker cotton garments show off the white underbase in DTF especially well, which is one of the reasons the method is so popular for black tees and hoodies.
Polyester and performance fabrics
Polyester is heat-sensitive and prone to two problems: scorching and dye migration. Press cooler, commonly in the 280°F to 300°F range, for a slightly shorter time with medium pressure. If you see a shiny scorch box or a faint colored haze creeping into the white ink after pressing, your temperature is too high. Drop it, extend the dwell time a little to compensate, and consider a cold or warm peel. Performance and moisture-wicking fabrics behave like polyester, so treat them the same way and test on a scrap first.
Dye migration is worth understanding in a little more depth because it is the one polyester problem that can appear hours after a press looks perfect. When polyester is heated, the disperse dyes in the fabric can turn into a gas that rises into the adhesive and ink layers, tinting your whites. Red, maroon, and other dark saturated polyester garments are the worst offenders. The two levers that fight migration are heat and time: less of both means less gassing. A cooler, carefully timed press, a cold peel, and choosing lower-migration garments when a project allows all help. If you press a lot of colored polyester and keep fighting haze, that is a signal to lower your temperature and lengthen your time rather than to keep reprinting at the same hot setting.
Poly-cotton and tri-blends
Blends split the difference. A 50/50 poly-cotton usually sits around 300°F to 315°F. Tri-blends, which add rayon, tend to be a little more delicate, so lean toward the polyester end of your range. Because blends vary so widely by brand and weight, a quick scrap test is always worth the one transfer it costs you. Blends give that soft, vintage hand feel that many customers love, so they are worth mastering.
Nylon
Nylon is the trickiest common fabric. It is very heat-sensitive and slick, so it needs the lowest temperatures (commonly 260°F to 290°F), light to medium pressure, and usually a cold peel. Think jackets, bags, and some athletic gear. Always test on an inside seam or a scrap, because nylon can shine, pucker, or warp if you press it too hot. If a nylon item has a waterproof or coated finish, test even more carefully, since coatings react unpredictably to heat.
Hoodies, sweatshirts, and thick fabrics
Thick garments are about heat penetration. The adhesive sits against the fabric under layers of fleece, so give the press a few extra seconds so the heat reaches all the way through. Pre-pressing is especially important here to flatten the nap and drive out moisture. Watch out for seams, pockets, and drawstrings, and use a pressing pillow to keep the design area flat and evenly pressed. Build your base inventory from blank hoodies and sweatshirts for repeatable results.
Caps and hats
Caps are a curved-surface challenge. A flat press struggles to apply even pressure across the dome of a cap, so a dedicated cap press or a curved platen attachment makes a dramatic difference. Use heat-resistant tape to hold the transfer on the curve, apply firm pressure, and expect to work with smaller designs that fit the flat front panel. Structured caps with stiff buckram fronts press more easily than soft, unstructured styles. Explore blank caps that press cleanly and keep a cap-specific settings note once you dial one in.
When pressing caps on a flat press out of necessity, unstructured or foam-front styles let you flatten the panel enough to get a bond, but the seam down the center front will always fight you. Keep designs clear of that seam, or split the artwork so it sits to one side. Mind the fabric content of the cap too: many caps are polyester or poly blends, which means you should treat them as heat-sensitive and press toward the lower end of the range rather than blasting them with cotton-level heat.

08
How to Apply DTF Transfers With a Home Iron
A lot of people search for how to apply DTF transfers and really mean "can I iron these on at home," because they think of DTF as a kind of iron-on transfer. The honest answer: yes, you can apply DTF transfers with a household iron, and for a single shirt or a quick fix it can work surprisingly well. The catch is consistency. An iron cannot hold a precise temperature and cannot deliver even pressure across a whole design, so results vary and durability is usually lower than a heat press. For anything you plan to sell or wash dozens of times, a press is worth it.
Setting up for an iron application
- Turn off the steam and empty the water. Steam introduces moisture, which hurts adhesion. You want dry heat only.
- Set the iron to its highest cotton setting (no steam). You cannot read an exact temperature, so you are approximating the heat-press range. For delicate synthetics, use a lower setting and test on a scrap.
- Use a hard, flat, heat-resistant surface. Do not use a padded ironing board, because it gives way under pressure and you will never get a firm, even bond. A wood board or countertop protected with a towel or Teflon sheet works.
Step by step with an iron
- Pre-press the bare garment by ironing the print area for about 5 seconds to remove moisture and wrinkles.
- Position the transfer printed side down, carrier film up, and cover it with parchment paper or a Teflon sheet.
- Press, do not slide. Hold the iron down with firm, heavy pressure using both hands. Do not glide it back and forth like you are ironing a shirt, because sliding shifts the design and smears the adhesive. Hold each zone for 8 to 10 seconds, then lift and move to the next zone, overlapping slightly so you cover the whole design, including every edge and corner.
- Work the edges and corners deliberately. The tip and heel of the iron let you concentrate pressure on stubborn spots that lift first.
- Peel per your film's instructions, hot or cold. When unsure, let it cool and cold peel.
- Second press through parchment for another 10 seconds or so to lock it in.
Care tips specific to iron applications
Because an iron bonds less reliably than a press, be gentler with the finished garment. Hang drying instead of machine drying is a smart move for iron-applied transfers, and always wash inside out on cold. If an iron-applied edge lifts later, you can usually re-press that spot with parchment and firm pressure to tack it back down.
Why an iron is a compromise, not a replacement
It is worth being honest about the limits. A heat press closes with hundreds of pounds of even force across the whole platen and holds a steady, known temperature. An iron gives you maybe a few pounds of hand pressure concentrated under a small soleplate at an unknown temperature that swings as the thermostat cycles on and off. You are doing by hand, imperfectly, what a press does perfectly. That is fine for a birthday shirt or a one-time gift, and plenty of people decorate their first items this way. But the moment you start selling, washing dozens of pieces, or caring about repeatable quality, the inconsistency of an iron will cost you more in reprints and unhappy customers than a modest press would have cost to buy. Treat the iron as a starter tool and a field-repair tool, not a production tool.
09
How to Apply DTF Transfers With a Cricut or EasyPress
Cricut-style presses and similar portable heat presses are a popular middle ground between an iron and a full heat press. They hold a set temperature far better than an iron and apply more even heat, but they are still limited by their smaller plate size and the pressure you can apply by hand. This is the route many crafters take, which is why "how to apply dtf transfers with cricut heat press" is such a common search.
Why a Cricut-style press is better than an iron
- It holds a precise, settable temperature, so you can match the recommended range for your transfer.
- It heats evenly across its plate, which reduces cold spots.
- It has a timer, so your dwell time is consistent every time.
Step by step with a Cricut-style press
- Set the temperature and time to your transfer's recommendation. If the device offers fabric presets, pick the one closest to your blank, then verify the temperature matches your transfer's range.
- Place the garment on a firm, flat, heat-resistant surface, ideally the mat that came with the press. Avoid a soft ironing board.
- Pre-press the bare garment for 3 to 5 seconds.
- Position the transfer printed side down, cover with parchment or Teflon.
- Press with firm downward pressure for the set time. Because the plate is small, you will likely need to press the design in sections for larger art. Overlap each section slightly so there are no gaps, and push down with real force, since you are the pressure source.
- Peel per your film, then do a second press through your cover sheet.
The big limitation: design size
The main constraint with any portable press is plate size. A large back print may be bigger than the plate, forcing you to press it in overlapping sections. Section-pressing works, but you have to be careful to reheat every part of the design evenly and to avoid double-pressing a spot so long that it scorches. For large full-front or full-back designs pressed often, a full-size flat heat press remains the better tool.

10
How to Cure DTF Powder With a Heat Press
Most people buy ready-to-press transfers, which means the adhesive powder is already cured and you never touch this step. But if you print your own DTF film or you buy uncured sheets, you need to melt and cure the powder before you can apply the transfer to a garment. Curing is a different operation from application, and confusing the two leads to brittle, flaky prints, so it is worth understanding how to cure DTF powder with a heat press.
What curing actually does
After the design is printed and the adhesive powder is applied to the wet white ink, the powder has to be melted so it fuses evenly into a smooth, continuous layer. Under-cured powder stays grainy and will not bond to fabric. Over-cured or scorched powder turns brittle and cracks. The goal is a melt that looks uniform and slightly glossy, with no dry, sandy texture remaining.
Curing with a heat press (non-contact method)
- Do not let the hot platen touch the powder directly. Direct contact smears the molten powder and ruins the film. Instead, hover the press just above the film without closing it, or tent the film under the open press so radiant heat does the work.
- Apply gentle radiant heat in the general range your powder specifies (typically a moderate heat for a short period). The powder should change from a dull, sandy look to a smooth, melted, slightly shiny surface.
- Watch for the visual cue. A properly cured film looks uniform and smooth. If you still see dry speckles, it needs a little more heat; if it looks scorched or bubbled, back off.
- Let it cool before storing or pressing. Cured film can be stored flat and pressed later like any ready-to-press transfer.
A dedicated curing oven or shaker-dryer gives far more consistent curing than a heat press, which is why production shops use them. For most readers, though, the simplest path is to buy transfers that are already cured and ready to press, so you can skip this step entirely and go straight to application.
Curing versus application: do not confuse them
It is easy to mix up these two heat steps, so keep them straight. Curing happens once, to the powder on the film, before the transfer ever meets a garment, and it uses non-contact radiant heat so the molten powder is not disturbed. Application happens later, with the cured transfer pressed firmly against the fabric so the adhesive flows into the fibers. A transfer that is under-cured will feel rough and will not bond well no matter how perfectly you press it, and a transfer that is scorched during curing will be brittle before you even start. This is the core reason ready-to-press transfers are so popular: the hardest variable to get right, the cure, has already been handled under controlled conditions, leaving you only the application to master.
11
How to Press DTF Gang Sheets
A gang sheet is a single large DTF film packed with many individual designs, arranged to use the film efficiently. Gang sheets are the economical way to order lots of transfers at once, and knowing how to cut and press them keeps that savings intact. The pressing itself is identical to any DTF transfer; the extra skill is trimming and organizing.
Trimming your designs
- Cut each design out of the gang sheet with scissors or a craft knife, leaving a small margin of clear film around the artwork. You do not need to cut tight to the edges, since the clear film is invisible once pressed on areas with no ink.
- Keep the pieces organized, especially if you are pressing many different designs onto different garments in a batch. Lay them out in the order you will press them.
- Mind the peel type for the whole sheet, since every design on one gang sheet shares the same film and therefore the same hot or cold peel behavior.
Pressing gang-sheet designs
Press each trimmed design exactly as you would a standalone transfer: pre-press the garment, position the design, cover, press at the right settings, peel, and second press. The efficiency of a gang sheet comes from batching. Set up an assembly line: pre-press a stack of blanks, position all your transfers, then position each on its garment, then press them in sequence. If your designs are cold peel, stagger your workflow so each garment has time to cool before you finish it.
Gang sheets are where new print businesses find their margin, because ordering one large film packed edge to edge with designs costs far less per design than ordering each piece separately. The skill that protects that margin is nesting your artwork efficiently when you build the sheet, then trimming cleanly so you do not waste film or accidentally cut into a neighboring design. If you order gang sheets regularly, keep a simple template of your most common design sizes so you can fill a sheet quickly without leaving large empty gaps.
A few gang-sheet cautions
- Do not overlap transfers when pressing two designs close together on the same garment, because overlapping film can leave a visible edge.
- Store leftover gang-sheet material flat and cool, away from direct sunlight and heat, so the adhesive stays fresh for later pressing.
- Test one design first from a new gang sheet to confirm your settings before you run the whole sheet, so a single bad setting does not cost you the entire batch.

12
How to Wash and Care for DTF Transfers
A great press can still fail at the laundry machine if the garment is not cared for correctly, so share these instructions with your customers. Done right, a properly applied and second-pressed DTF transfer holds up through many dozens of washes with bright color and a soft hand.
The first wash and beyond
- Wait at least 24 hours before the first wash so the adhesive fully cures and sets into the fabric.
- Turn the garment inside out before washing to protect the print from abrasion against other items.
- Wash in cold water on a gentle or normal cycle. Hot water stresses the adhesive and fades color faster.
- Use a mild detergent and skip the bleach and fabric softener. Bleach degrades the ink, and softeners can leave a residue that affects the print surface.
Drying and ironing
- Tumble dry on low or hang dry. Hang drying is gentlest, and it is especially recommended for iron-applied transfers. High dryer heat is one of the fastest ways to crack or lift a print over time.
- Never iron directly on the design. If a garment needs touching up, iron it inside out, or place a cloth or parchment over the design and use low heat.
- Avoid dry cleaning, since the chemicals and heat involved can damage the transfer.
These simple habits are the difference between a print that looks new after a year and one that cracks within a month. When you sell finished apparel, a small care card goes a long way toward happy, repeat customers. If you decorate custom pieces for clients, consider building those care instructions into your custom apparel packaging.
How durable is a properly applied DTF transfer?
When heat, time, and pressure are correct, a second press is done, and the garment is washed gently, a DTF transfer is one of the more durable decoration methods available. It stretches with the fabric rather than cracking, resists fading, and keeps sharp edges on fine detail far better than many alternatives. The failures people blame on DTF almost always come from one of the controllable steps covered in this guide: a skipped pre-press, weak pressure, an under-heated platen, a mishandled peel, a missing second press, or harsh laundering. Nail those, and durability takes care of itself.
Storing unused transfers
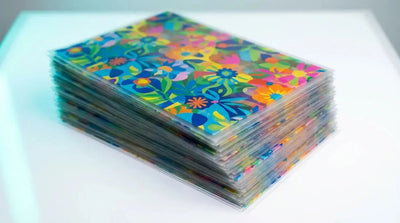
If you buy transfers in advance, store them well so they are ready when you are. Keep them flat, out of direct sunlight, and away from heat sources and high humidity. Stacked flat in a drawer or folder is ideal. The adhesive powder on a cured transfer stays viable for a long time under good storage conditions, so there is no need to rush through a large order. Just keep the films from curling, creasing, or collecting dust, since a dusty transfer will carry that debris into the bond.
13
Troubleshooting DTF Transfers
Even experienced pressers hit problems. The good news is that almost every DTF issue traces back to one of the three core settings, the pre-press, or the peel. Here is how to diagnose and fix the most common failures.
My DTF transfer is peeling or lifting at the edges
Peeling usually means the adhesive never fully bonded, which points to too little heat, too little time, or too little pressure. Work through these in order:
- Increase pressure first. Weak pressure is the most common culprit. Make sure you are pressing firmly and evenly, and relieve any seams or zippers that are stealing pressure from the design area.
- Add a few seconds of time, especially on thick garments where heat struggles to reach the adhesive.
- Confirm your real temperature with a thermometer or test strip, since a press that reads hot but runs cool will under-bond every transfer.
- Always do the second press. Skipping it is a frequent cause of early edge lifting.
- Re-press a lifted spot by covering it with parchment and pressing firmly at temperature to tack it back down.
My DTF transfer is not sticking or adhering at all
If the design barely grabs the fabric, the most likely causes are moisture, a missed pre-press, or a cold platen:
- Pre-press every time to drive out moisture. A damp garment turns to steam and blocks the bond.
- Let the press fully heat up before your first application of the session.
- Check that you pressed printed side down, because a transfer placed film side down will not transfer at all.
- If it still will not adhere, lay the design back down, cover it, and re-press with slightly more time and firm pressure.
My garment scorched or shows a shiny press box
Scorch marks and glossy rectangles around the design mean too much heat for that fabric:
- Lower the temperature, especially on polyester, nylon, and blends, and extend the dwell time slightly to make up for it.
- Use a cover sheet during both presses to protect the surrounding fabric.
- Reduce dwell time if the design itself looks melted or overly glossy.
- Test heat-sensitive fabrics on a scrap before committing to a finished garment.
I see a faint colored haze in my white ink (dye migration)
A pink, gray, or yellow tint creeping into white areas on a colored polyester garment is dye migration. The garment's dye is gassing off under heat and staining the ink. Fix it by dropping the temperature into the low end for polyester, shortening the time, and using a cold or warm peel. On garments that are especially prone to migration, a cooler, longer press is your friend.
My print cracks after washing
Cracking points to under-curing, under-pressing, or harsh laundering. Confirm you pressed at the right temperature and pressure, always do a second press, and make sure the care instructions (cold wash, inside out, low or no dryer heat) are being followed. If you print your own film, cracking can also mean the powder was under-cured before application.
My design shifted or looks blurry
A shifted or ghosted image usually means the transfer moved during pressing. Use heat-resistant tape to anchor the transfer, and never slide an iron across the design. With a press, make sure you are not bumping the garment when you position the cover sheet or close the platen.
My print feels stiff or too plastic
A heavy, plastic hand usually comes from over-pressing, too much adhesive, or finishing through a glossy sheet. For a softer feel, press through parchment on the second press rather than a slick Teflon sheet, and do not exceed the recommended time. Keep in mind that DTF naturally has a bit more hand than a water-based screen print; the tradeoff for that slight surface feel is DTF's excellent stretch, opacity on dark garments, and durability. Choosing blanks with a smoother face and pairing matte finishing will get you the softest result the method allows.
My whites look dull or grayish on a dark shirt
DTF relies on a white ink underbase to make color pop on dark fabric. If whites look muddy, first rule out dye migration from the garment, then confirm you did not scorch the print with too much heat, which can slightly yellow the surface. A clean press at the correct temperature keeps whites bright. If the transfer itself looks weak before pressing, that is a print-quality issue at the source, which is one more reason to start with well-made transfers.
A general troubleshooting mindset
When something goes wrong, resist the urge to change three settings at once. Change one variable, press a test, and observe. Because nearly every DTF failure maps back to heat, time, pressure, moisture, or peel timing, methodical single-variable testing will find your problem fast. Keep a small notebook of what failed and what fixed it, and within a few sessions you will rarely need this section at all.

14
Frequently Asked Questions
What temperature do you apply DTF transfers at?
As typical general guidance, most DTF transfers apply well somewhere between 300°F and 325°F, with heat-sensitive fabrics like polyester and nylon pressed cooler (often 260°F to 300°F) to avoid scorching and dye migration. These are starting ranges only. Always follow the exact temperature printed on or shipped with your transfers, because films and powders vary by supplier.
How long do you press a DTF transfer?
A typical DTF press runs about 10 to 15 seconds. Thin garments sit at the shorter end, while thick items like hoodies and canvas bags often need a few extra seconds so the heat reaches the adhesive. Then, after peeling, add a second press of 10 to 15 seconds to lock the design in. Use your transfer's recommended time as the authoritative number.
Is DTF hot peel or cold peel?
It depends on the specific film your transfer is printed on. Hot peel films are removed immediately while hot; cold peel films must cool completely first. The only reliable way to know is to check the instructions that came with your transfers. If you are genuinely unsure, default to letting it cool and peeling cold, since a premature hot peel can lift the design.
Can you apply DTF transfers with an iron?
Yes, you can apply DTF transfers with a household iron for small or occasional jobs. Turn off the steam, use the highest appropriate dry-heat setting, work on a hard flat surface, and press firmly in sections without sliding. Results are less consistent than a heat press, so for items you will sell or wash often, a flat heat press or a Cricut-style press is the better choice.
Why is my DTF transfer peeling or not sticking?
The most common causes are too little pressure, too little time, a platen that is cooler than its display, a skipped pre-press, or trapped moisture. Increase pressure first, then time, confirm your real temperature, always pre-press the garment, and never skip the second press. If an edge lifts later, re-press that spot through parchment with firm pressure.
Do you need a second press for DTF transfers?
Yes. A second press after you remove the carrier film seals the ink, improves wash durability, and lets you choose a matte or glossy finish. Cover the design with parchment or a Teflon sheet and press for 10 to 15 seconds, then let it cool fully. It takes seconds and meaningfully extends the life of the print.
How do you wash DTF transfers so they last?
Wait at least 24 hours after pressing before the first wash. Then turn the garment inside out, wash in cold water with mild detergent, and skip bleach and fabric softener. Tumble dry on low or hang dry, and never iron directly on the design. These habits keep colors bright and prevent cracking for dozens of washes.
How do you cure DTF powder with a heat press?
If you print your own uncured film, cure the adhesive powder with radiant heat and without letting the hot platen touch the film directly. Hover or tent the film under the open press until the powder turns from a dry, sandy texture to a smooth, slightly glossy melt, then let it cool. Most people avoid this step entirely by buying transfers that are already cured and ready to press.
Can you press DTF on polyester and nylon?
Yes, but both are heat-sensitive. Press polyester cooler (commonly 280°F to 300°F) to avoid scorching and dye migration, and press nylon cooler still (commonly 260°F to 290°F) with light to medium pressure and a cold peel. Always test on a scrap or an inside seam first, because synthetics can shine or warp if pressed too hot.
15
Press With Confidence, Starting With the Right Transfers
Once you understand how to apply DTF transfers, the whole process becomes routine: pre-press, position, press at the right temperature and time with firm pressure, peel the way your film specifies, and finish with a second press. Respect the fabric in front of you, press synthetics cooler, and always trust the instructions that ship with your transfers over any general chart. Do that, and you will turn out crisp, durable, professional prints on cotton, blends, poly, caps, totes, and more.
The last ingredient is a quality transfer to start from. Clean, well-printed, properly cured DTF film is far easier to apply and far more forgiving than a cheap one. Browse ready-to-press designs and custom options across the full range at DTF Dallas ready-to-press transfers, or explore specialty options like UV DTF cup wraps. When you are ready to put your new skills to work, start at the DTF Dallas homepage and build your next batch.
Ready to press your next design?
Browse hundreds of ready-to-press DTF transfers, printed in Dallas and built to last.
Browse DTF Transfers
Contents0%
- 01What You Need to Apply DTF Transfers
- 02DTF Heat Press Settings: Temperature, Time, and Pressure
- 03DTF Temperature Chart: Typical Settings by Fabric
- 04How to Apply DTF Transfers Step by Step
- 05Hot Peel vs Cold Peel DTF
- 06Do You Need a Second Press on DTF Transfers?
- 07How to Press DTF Transfers by Fabric Type
- 08How to Apply DTF Transfers With a Home Iron
- 09How to Apply DTF Transfers With a Cricut or EasyPress
- 10How to Cure DTF Powder With a Heat Press
- 11How to Press DTF Gang Sheets
- 12How to Wash and Care for DTF Transfers
- 13Troubleshooting DTF Transfers
- 14Frequently Asked Questions
- 15Press With Confidence, Starting With the Right Transfers
Comments 0
Be the first to leave a comment.