
DTF Troubleshooting Matrix: 30 Problems, 30 Fixes | DTF Dallas
Aug 1, 2026 (Updated on Oct 8, 2026)
When a DTF application goes wrong, the failure usually falls into one of five categories: adhesion, color quality, peel problems, wash durability, or equipment issues.
This matrix organizes 30 real DTF problems by category, with the root cause and the fix for each. Bookmark it before your next press run.
CATEGORY 01Adhesion & BondingProblems 1 to 6 CATEGORY 02Color & Print QualityProblems 7 to 12 CATEGORY 03Peel ProblemsProblems 13 to 17 CATEGORY 04Wash DurabilityProblems 18 to 22 CATEGORY 05Equipment & ProcessProblems 23 to 30
Quick answer: what causes most DTF problems?
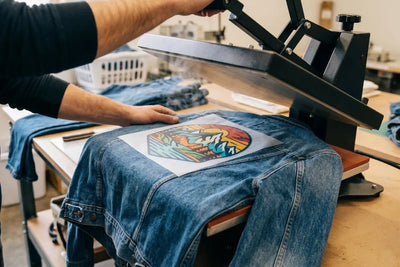
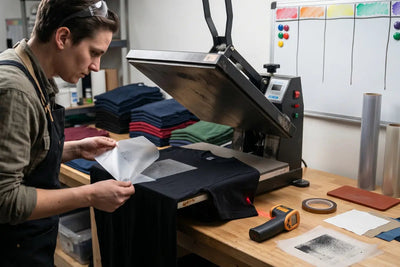
Most DTF failures trace to one primary cause: press temperature, press time, platen pressure, file setup, or fabric prep. The single most common culprit is running too hot or pressing unevenly. The DTF Dallas standard press is 290 to 310°F, high pressure for 6 seconds or medium pressure for 8 to 15 seconds, with a pre-press to remove moisture and a finishing press to seat the edges. Fix one variable at a time and test on scrap before running production.
The DTF Dallas standard press settings referenced throughout this matrix are the baseline to calibrate against:
Temperature290 to 310°F
High pressure6 seconds
Medium pressure8 to 15 seconds
Pre-press3 to 5 seconds (remove moisture)
Finishing press5 seconds (silicone sheet)
Resolution300 DPI at print size
CAT 01
Adhesion & Bonding Failures
01Transfer not sticking at all
CauseTemperature too low, time too short, or platen calibration off.
FixVerify platen temperature with an infrared thermometer. Set the DTF Dallas standard of 290 to 310°F, high pressure 6 seconds or medium pressure 8 to 15 seconds. Set temp and actual temp often differ by 10 to 20 degrees.
02Edges lifting immediately after peel
CauseUnder-pressed edges from uneven platen pressure, or peeling before the adhesive is ready.
FixCheck platen pressure consistency across the full surface. Do a finishing press with a silicone sheet for 5 seconds at the same temperature. On cold peel transfers, wait until completely cool before peeling.
03Center bonded, edges not
CauseUneven platen pressure (higher in center, lower at edges) or a warped platen.
FixTest with heat-sensitive tape across the full platen surface to map pressure distribution. Adjust pressure or service the press. A silicone foam lower platen pad helps distribute pressure more evenly.
04Transfer sticks but lifts after first wash
CauseUnder-cure on the adhesive. Pressing temp was low, time was short, or the fabric had moisture at the time of pressing.
FixPre-press the garment 3 to 5 seconds to remove moisture. Press at full temperature for full time. Do a finishing press after peeling.
05Adhesive visible around design edges (gummy border)
CauseToo much hot-melt powder applied during production, or excess powder not fully cured.
FixOn your own production, shake excess powder before curing. On transfers purchased from a supplier, contact them about the overcoating issue. A finishing press sometimes helps seat excess adhesive.
06Transfer will not bond to the substrate at all
CauseCoated, waterproof, or DWR-treated fabric surface preventing fiber contact.
FixTest adhesion on a small area first. Lightly scuff treated surfaces, or accept that some coated fabrics are not compatible with DTF.
CAT 02
Color & Print Quality Issues
07Colors look dull on dark shirts
CauseThe white underbase layer is too thin or under-cured, causing colors to appear muted against the dark background.
FixVerify the white layer is present in the file for dark-substrate orders. On self-printed transfers, check white ink density. For purchased transfers, confirm the order was specified for dark fabric.
08Colors shifted from what was designed
CauseFile submitted in RGB, output printed in CMYK with no conversion, or a monitor calibration versus print output difference.
FixConvert files to CMYK before submitting. Use the CMYK values from your brand guidelines rather than relying on monitor color matching.
09Grainy or pixelated print output
CauseSource file resolution is too low. DTF requires 300 DPI at print size.
FixDo not upsample a low-resolution file, since it cannot recover resolution that was not there. Re-create or re-source the artwork at 300 DPI.
10Shadow lines or ghost outlines in the design
CauseThe file has an unintended drop shadow, stroke, or layer artifact that was not visible at small preview size.
FixZoom to 100% in Photoshop or Illustrator and inspect all layers. Remove any unintended strokes, shadows, or bleed effects before submitting.
11White showing through design on dark shirt
CauseThe white underbase extends outside the design boundary in the file, creating a visible white border.
FixCheck that the white layer in the file is clipped or masked to the exact design boundary. The underbase should not extend beyond the color artwork.
12Yellow or brown cast on transferred colors
CauseDye migration from polyester fabric into the white ink layer during pressing.
FixReduce pressing temperature to the lower end of your range on high-risk polyester colors. Extend cool-down before pressing if the garment was stored hot.
CAT 03
Peel Problems
13Carrier film tears during peel
CausePeeling too cold on a hot-peel transfer, or peeling at too shallow an angle.
FixPeel hot-peel transfers promptly after pressing. Always peel at a sharp angle close to 180 degrees back on itself, not at a wide angle pulling away from the fabric.
14Design comes off with the carrier film
CauseAdhesive did not bond. Under-pressed, wrong substrate, or coated surface.
FixIncrease temperature, verify press time, and check substrate compatibility. If the design peels cleanly off with the film, adhesion has failed completely.
15Film peeling in sections, sticking in others
CauseUneven platen pressure across the design area.
FixMap your platen pressure with heat-sensitive tape. The sections where film still sticks correspond to low-pressure zones.
16Adhesive residue left on garment after peel
CauseOver-pressing (too hot, too long) causes adhesive to flow beyond the transfer boundary.
FixReduce temperature or press time. On a finished garment with residue, a warm re-press with a silicone sheet sometimes lifts the excess.
17Transfer crinkles or wrinkles during peel
CauseFabric too hot and stretchy during hot peel, or too much tension on the carrier film.
FixPeel at the correct angle and let the carrier film release naturally rather than pulling hard. On stretch fabrics, peel more slowly.
CAT 04
Wash Durability Failures
18Transfer cracking after first wash
CauseOver-pressing (too hot or too long) makes the adhesive brittle, or a film type not suited to the stretch demands of the fabric.
FixReduce press temperature by 10 degrees and test again. For stretch fabrics, confirm the transfer film is rated for stretch substrates.
19Transfer peeling at edges after washing
CauseEdge adhesion failure from the original press, or customer washing on high heat.
FixDo a finishing press at time of application to reinforce edges. Give customers care instructions: cold wash, inside-out, no high-heat dry.
20Transfer fading after multiple washes
CauseNormal wear is gradual over many cycles. Premature fade within the first 10 washes indicates under-cured ink or low-quality transfer film.
FixVerify supplier quality. DTF Dallas transfers on cotton and polyester are tested to hold color with minimal fade for 50 or more wash cycles with correct care.
21Transfer shrinking and lifting at edges after first wash
CauseUnwashed fabric shrank after decoration, putting dimensional stress on the transfer edges.
FixPre-wash garments, especially rayon, cotton, and denim, before applying DTF to pre-shrink the fabric. The guide to the best fabrics for DTF transfers explains which fabric types require pre-washing and why it prevents this failure.
22Design stiffening or hardening over multiple washes
CauseAdhesive absorbing detergent or fabric softener residue over repeated cycles.
FixAdvise customers to avoid fabric softener on garments with DTF decoration. Softener residue affects the adhesive layer over time.
CAT 05
Equipment & Process Issues
23Press leaving a rectangle mark around the design
CausePlaten edge contact marks from a hard platen edge or too much pressure.
FixUse a silicone pressing pad. Feather the pressure at the platen edges. Reduce overall pressure if the marks are deep.
24Fabric scorching or sheen change in press area
CauseTemperature too high for the fabric type. Common on polyester, nylon, and synthetic blends.
FixReduce temperature and verify platen calibration. For synthetic fabrics, test at the lower end of your temperature range. Running hot is the most common cause of scorch.
25Smoke coming from the press during application
CauseFabric moisture vaporizing under heat (normal, minimal smoke), or temperature too high causing fabric degradation (abnormal, visible smoke).
FixA slight wisp of steam is normal. Visible smoke with a burning smell means the temperature is too high or the fabric contains synthetic content that is scorching. Reduce temperature immediately.
26Transfer applied crooked
CausePlacement without alignment guides, or garment shifted during press close.
FixUse a laser alignment tool, placement tape, or a registration grid on your lower platen. Tack the garment to prevent shift as the press closes.
27Uneven adhesion on thick seams or pocket areas
CauseDesign placed over a seam ridge, creating an elevated surface that disrupts platen contact.
FixAvoid placing designs over seam ridges. Use a seam roll or a small foam shim under the seam area to level the surface before pressing.
28Transfer not releasing from carrier film on cold peel
CauseNot cold enough before peeling, or adhesive over-bonded to the carrier film from over-pressing.
FixFor cold peel transfers, let cool fully, 2 to 3 minutes minimum. If still sticking, the transfer may have been over-pressed and the adhesive rebonded to the carrier. Reduce press time by 2 seconds and test.
29Fabric stretching in press area after pressing
CauseHigh pressure on stretch or knit fabrics can permanently elongate the fibers in the press zone.
FixReduce pressure. On spandex and stretch fabrics, medium pressure is the maximum. Check the garment is properly aligned on the lower platen so stretch is even.
30Repeat orders looking different from the first batch
CausePress calibration drift, file version differences, or supplier production variation.
FixLog your press settings for every production run. Keep master files version-controlled. When repeat orders must match, submit the same file to the same supplier and note the original order number for reference.
Using This Matrix
Most DTF failures have one primary cause. Start with the most likely cause for your symptom, fix that one variable, and test on a scrap piece before running production. Changing multiple variables at once makes it impossible to identify which fix resolved the problem.
For the pressing workflow variables that affect most of the adhesion and durability issues above, the step-by-step guide to applying DTF transfers ready to press covers the peel decision at every step. For fabric-specific settings that prevent scorch and dye migration, the optimal DTF heat press settings guide covers the temperature variables most likely to cause problems 12, 24, and 25 above.
Rule out the transfer first. DTF Dallas produces custom DTF transfers on professional equipment with quality-controlled production. If your transfers are producing consistent failures, contact the shop before assuming the problem is in your press setup. Production defects are rare but do happen, and DTF Dallas stands behind print quality.
Frequently Asked Questions
Why is my DTF transfer not sticking?
A DTF transfer that will not stick most often means the temperature was too low, the time too short, or the platen pressure uneven. Verify the platen with an infrared thermometer, since set temp and actual temp often differ by 10 to 20 degrees, and press at the DTF Dallas standard of 290 to 310°F. Coated or waterproof fabrics can also block adhesion. Order quality-controlled transfers from the DTF transfer collection.
Why does my DTF crack or peel after washing?
Cracking after the first wash points to an over-pressed transfer, making the adhesive brittle, so reduce the press temperature by 10 degrees and test again. Edge peeling points to under-pressed edges or high-heat washing, fixed with a finishing press and cold, inside-out care. DTF Dallas transfers are tested to withstand 100+ washes when properly applied and cared for. Order them from the DTF transfer collection.
Why do my colors look dull or wrong on dark shirts?
Dull colors on dark fabric mean the white underbase is too thin or under-cured, so the dark garment shows through and mutes the color. Confirm the file includes a white layer specified for dark substrates. Colors that shift from the design point to an RGB file printed in CMYK, so convert to CMYK first. DTF Dallas calibrates white ink density for dark garments. Order dark-ready transfers.
What is the correct DTF press temperature?
The DTF Dallas standard is 290 to 310°F, high pressure for 6 seconds or medium pressure for 8 to 15 seconds, with a 3 to 5 second pre-press to remove moisture. Drop to the lower end for polyester and synthetics to avoid scorching and dye migration. Running too hot is the single most common cause of scorch, cracking, and residue. Order transfers matched to these settings from the DTF transfer collection.
How do I make repeat DTF orders match the first batch?
Log your press settings for every run, keep master artwork files version-controlled, and submit the same file to the same supplier, noting the original order number for reference. Batch differences come from calibration drift, file versions, or supplier variation. DTF Dallas runs quality-controlled production for consistent reorders. Reorder from the DTF transfer collection or contact the shop with your original order.
My transfers keep failing. Is it my press or the transfer?
Isolate the variable: fix one thing at a time and test on scrap before production, since changing several at once hides which fix worked. Most failures are press-side (temperature, pressure, moisture, file setup), but production defects do happen. DTF Dallas produces on professional, quality-controlled equipment and stands behind print quality. If failures are consistent, contact the shop through the contact page before assuming it is your setup.
Rule Out the Transfer with DTF Dallas
Quality-controlled production · Same-day before 2 PM CT · No minimums
Order DTF transfers →Thirty problems, thirty fixes, five categories. Most DTF failures come down to one variable: temperature, pressure, file setup, or fabric prep. Work through the matrix one symptom at a time, calibrate against the DTF Dallas standard settings, and test on scrap before every production run. When the transfer itself is the issue rather than the press, DTF Dallas stands behind quality-controlled production.
Comments 0
Be the first to leave a comment.